How to recover deleted files using Magic Uneraser
Step 1:
Choose a disk and analyse it
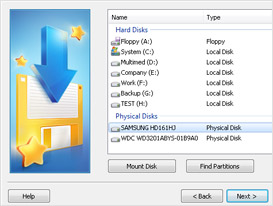
In the left part of the program choose a disk which contains deleted files. At program panel press button “Analyse”. Magic Uneraser will start analyzing the chosen disk and will display its contents. This procedure will take some time.
You can stop analysis process, pressing button “Stop Analyse”, however we recommend waiting while the program finishes its operation and analyses the whole disk.
Step 2: Find deleted file
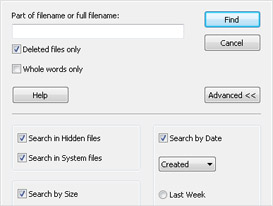
After analysis is complete, the program will display a list of folders located on the selected disk. Select a folder on the left, after which you can view its contents in the main part of the program. In addition to existing files and folders, you can also view deleted ones. They will be flagged with a special red dagger. You can use the “Find File” option to find the file you need. For your convenience, use the “Filter” option (“View” – “Filter”) in order to see only deleted files and hide existing ones. Use the main part of the program to view, select and recover files and folders. If the “Preview” option is active, then after selecting a file you will be immediately able to view its contents in the upper-right portion of the program.
Step 3:
Restore necessary file
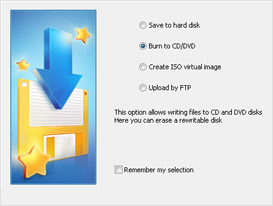
In the main area select the files and folders you wish to recover and click “Recovery” in the toolbar. The Save Wizard will open. It is a convenient, step-by-step wizard which allows you to easily save recovered files. Simply follow the instructions closely.
Here you are asked to choose one of four methods for saving your files (save to hard disk, burn to CD/DVD, create virtual ISO image, save on the Internet through a FTP server).
Additional options for restoration
Content-Aware Analyse
Use the “Deep Analyse” function (in the “File” menu) if you are unable to find files when analyzing the disk.
This function conducts a detailed scan of the disk selected in the left part of the program window, finding deleted files by using file signatures. The program creates a “Deep Analyse” folder on the left-hand part of the screen and will add found files to this folder, sorting them by file extension.
You may stop the analysis process by clicking “Stop Analyse”.
You may also wish to use the “Deep Analyse” function to analyze the physical disks on your computer. Using this function, you can recover files from reformatted disks.
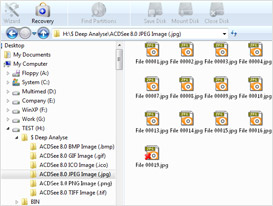
Important! When using “Deep Analyse”, all information about found files (name, size, date, attributes) will be lost.
Preliminary viewing
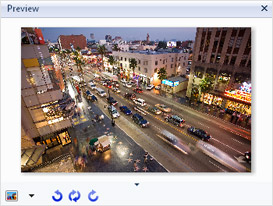
The “Preview” toolbar allows you to view the contents of files before recovering them. You can show or hide the preview toolbar by going to “View” – “Toolbars” – “Preview”.
The preview toolbar is in the upper-right hand corner of the program and has two tabs: “Hex” and “Preview”. The first bookmark (“Hex”) displays file contents in a hexadecimal view (as Hex-editor) and has three columns: the address, contained in a hexadecimal view and contained in coding ASCII. The second bookmark (“Preview”) allows to look through document contents in a view habitual to you (it can be photo, or document MS Office, or the text document etc.).
In the preview toolbar you can show or hide a menu with additional buttons in the lower portion of the toolbar.
Search of deleted partitions
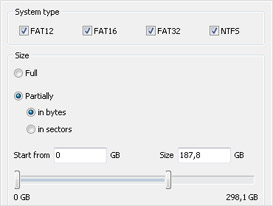
The program allows for recovering files from deleted disks. To do so, in the left-hand part of the program choose the hard disk on which you wish find the deleted partition, and select “Find Partitions” in the “File” menu.
In the resulting window indicate the type of file system to search for and the area to search.
All found partitions will be added to the list of disks in the left part of the main program window. Now you can work with them as with existing disks.
Choice the file beginning
In some cases (only with FAT file system) the program can wrongly define the file beginning, and there are some variants. Other programs simply take the first variant therefore, for example, instead of the necessary photo you receive absolutely another. Magic Uneraser offers you all variants.
To see a choice window of the beginning file is possible in two ways. If the option “Preview” is active, so while allocation file in the left top part of the preview panel button of a choice of the beginning of a file appears. Also the choice window appears while restoration of such file.
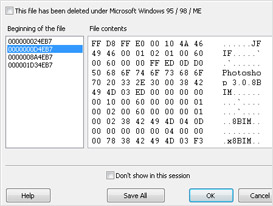
In the left part of the window variants of the first file sector are offered to you. Choosing values in the left side, you can look through file contents in the right.
The button “Save All” allows to save file in all offered variants, thus if the file is called, for example, “My file.txt” it will be saved as “My file1.txt”, “My file2.txt”, “My file3.txt” etc.
If you choose an option “Don’t show in this session” and will press “Save All” the program will not display any more this window, and will apply this option to all same files.
Help
Useful Articles
