Working with Disk Images
The program can create and then use images of disks that already exist or have been found on your computer. If you deleted any sort of file on a disk, then you can create an up-to-date disk image and save it. Now you can continue working without fear, knowing that the deleted data will not be overwritten by new files. Subsequently you can launch the program, mount the saved image, and recover the deleted data from it.
To create an image during the first step (disk selection) you will need to select the necessary volume or physical disk and click “Options” – “Save Disk”.

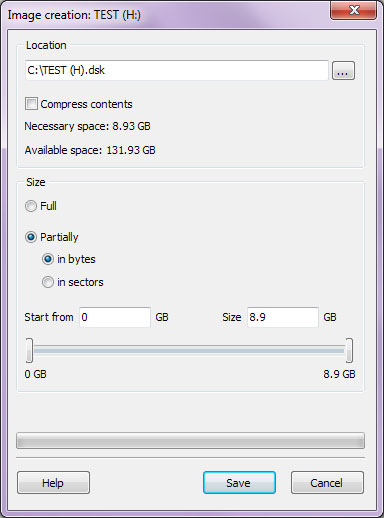
In the resulting window specify the name and file path for the disk image and the portion of the disk to save.
Important! When creating an image, it is recommended to save all of the disk instead of just a portion, or else problems may arise due to insufficient data when analyzing and recovering files from the image.
The “Compress contents” option is available only on NT-based operating systems (NT / 2000 / XP / 2003 / Vista / 2008 Server / 7 / 8). The contents of the resulting image will be compressed with the standard Windows LZNT1 algorithm, thus reducing the size of the generated image and saving disk space.
To open a saved disk’s image, click “Options” – “Mount Disk”, or simply drag it from the Windows Explorer to the disks’ list. The mounted image will be added to the list of disks. Now you can work with it just like with an existing disk.
To close an image, select the mounted disk and click “Options” – “Close Disk”.
Content