Disk Analysis Results
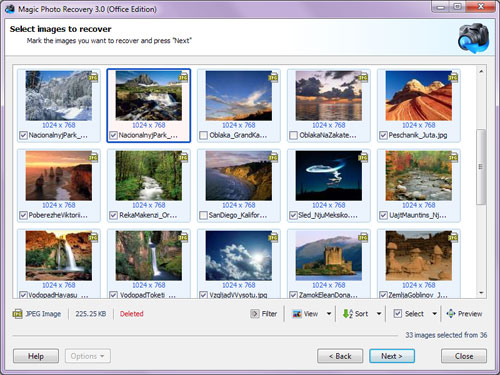
The application adds all detected recoverable images to the preview list, where you can preview them, apply filtering and sorting and mark the files to be recovered. The image selection window is displayed immediately after the disk analysis process has finished. Here you can select the photos to be recovered.

The image list occupies most of the program window. The lower part contains the following image management buttons:
Filter – enables/disables filtering. You can filter images by type, mask, size and dimensions. Once the filter is applied, the image list will display only those images that meet the current filtering criteria. To display all images, press the “Disable” button to disable filtering.
View – changes the view of the list of images (“Thumbnails”, “Large Icons”, “Medium Icons”, “List”, “Details”, “Tiles”).
Sort – you can sort the list of images by name, type, status, size and dimensions. If you choose the “No sorting” option, the images will be shown in the order of detection on the currently selected disk.
“Select” is used to select images.
Preview – allows you to preview the selected image.
Read more about preview…
To view an image’s properties right click it and select “Properties” from the pop-up menu.
Read more about the properties window…
The Save Wizard will be opened when you move on to the following step.
Content